Click here for more One Piece tutorials
Today our drawing tutorial is of Chopper Man from the One Piece Manga series. Don’t be fooled by that bunny rabbit face and big eyes, Chopper Man’s cuteness is his deadliest weapon. Anyone who isn’t overwhelmed and destroyed by that adorable face will have to stand up to the flying ace, as Chopper Man’s mantle gives him a heck of lift. If cuteness and flying doesn’t work, he’s got a back up with his Chopper Violence attack that works particularly well on robots that are unsusceptible to the power of Chopper Man’s cute attack. He just confirms the old saying that you can’t really judge a book by its cover ^_^. If you’re interested in other One Piece manga tutorials just click on the One Piece tag in the tag cloud on the right side of the page. Everyone, get your pencils ready as we start our Chopper Man tutorial today.
Step 1
Step 1: As any returning mangakas already know, all of the lines that are blue that you see in the tutorial are construction lines and will be erased later. So make sure you draw them in pencil and have a kneadable eraser handy to correct any mistakes or lighten any of the lines. We’ll save our pen for our final lines which you’ll see in black at the end of the tutorial.
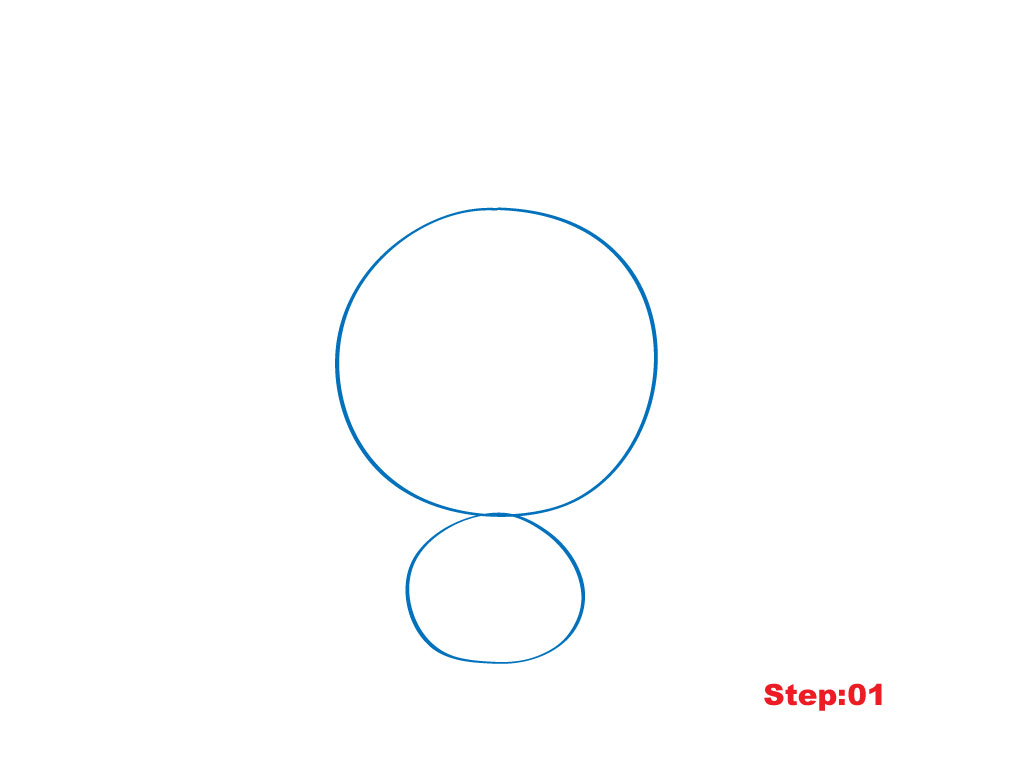
We’ll begin with our head and body circles. Start by drawing a large circle in the middle of your paper. Below that, and slightly smaller that the half of the size, we’ll draw another circle for the body. We should have enough room above and on either side of the head circle for Chopper Man’s regal head gear.
Step 2
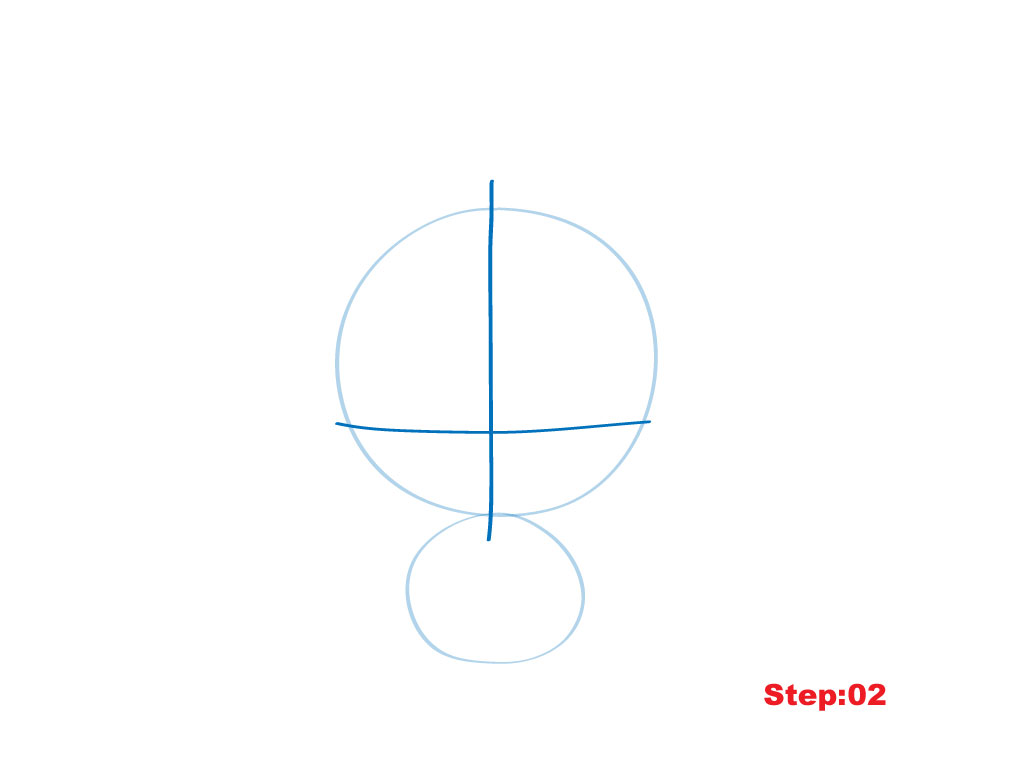
Step 2: Now, it’s time to add the center and eye lines to the head circle that will help us to locate Chopper Man’s eyes and facial features. Draw a vertical line cutting the head shape in two. Next, the eye line will be horizontal about a third of the way up the head circle.
Step 3
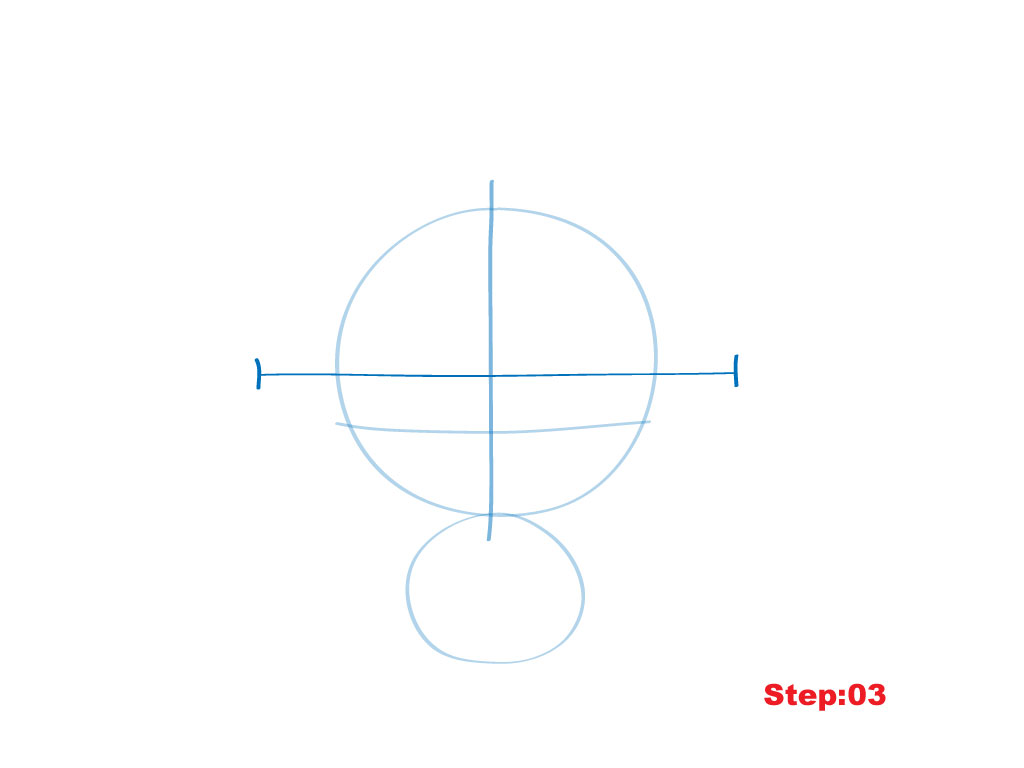
Step 3: Moving right along. In this step we’ll be drawing another construction line for Chopper Man’s hat. We need to draw a horizontal line that divides the head circle in two. The line should be longer than the width of the head circle and have a vertical tip added at either end.
Step 4
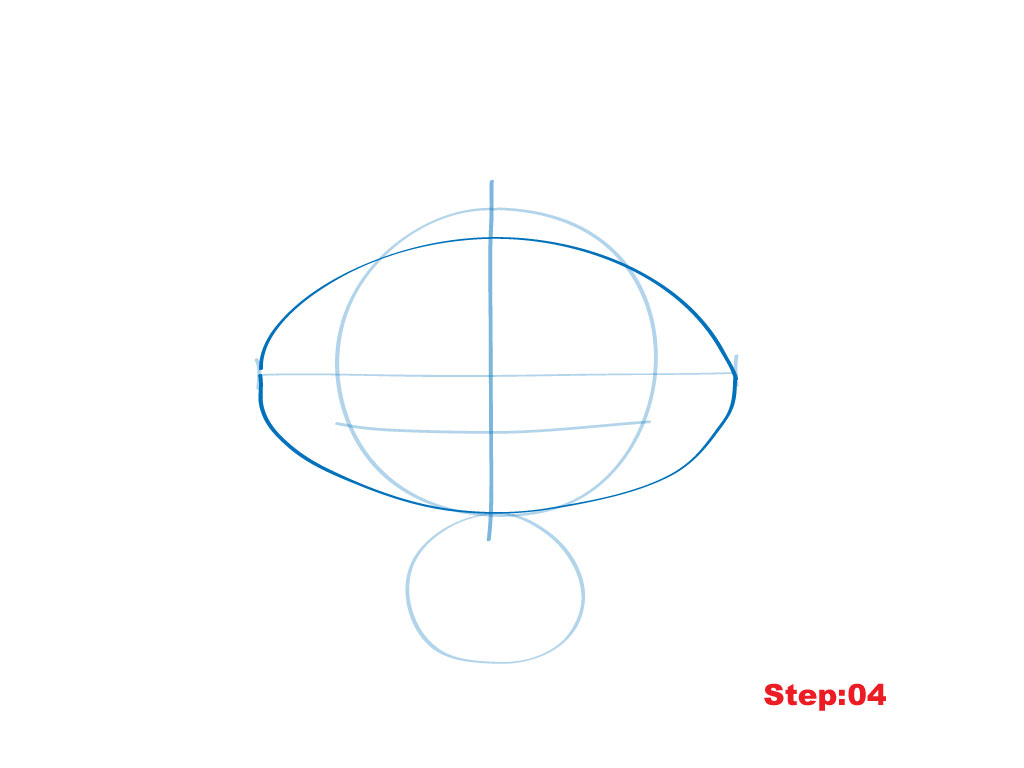
Step 4: Great job, mangakas. Here, we’ll connect the ends of the line we drew in the previous step with an upward and downward curving line. The lower curve will touch the bottom of the head circle but the upper line will be lower than the top of the head circle. Our final shape should resemble an American football.
Step 5
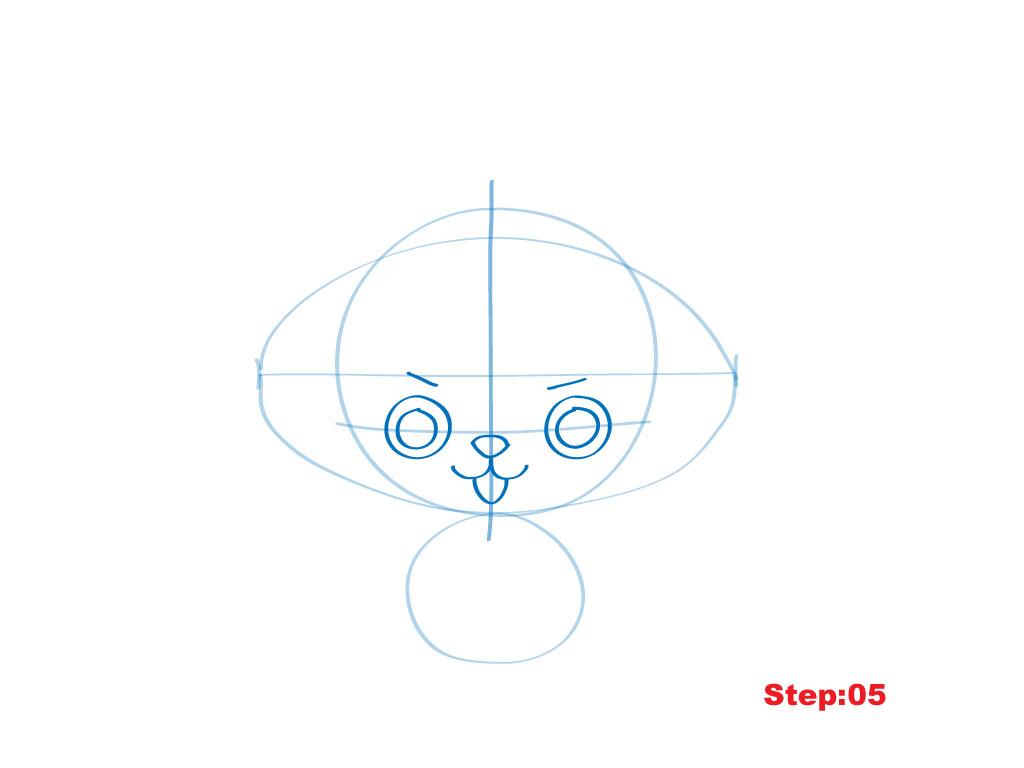
Step 5: AHHH!! Here comes the cute attack, already! We’ve got to put in his facial features. Is he part kitten, part rabbit? Who knows, he sure is cute though. We’ll draw two circles for each eye on the eye line, one inside of the other. Add two dashes over each eye but below the hat line for his eyebrows. The rest of Chopper Man’s face looks like a cat, so we’ll draw a diamond like shape for his nose in the center and just below the eye line. Add a short “W” like shape for the mouth, and don’t forget about his tongue.
Step 6
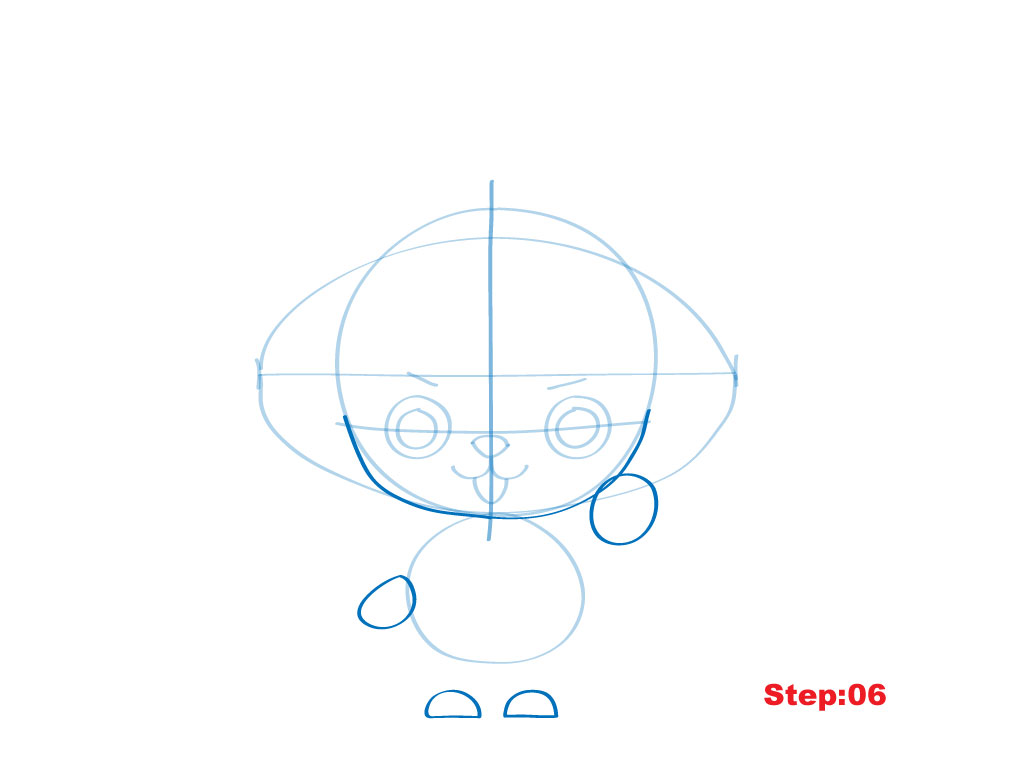
Step 6: The next couple of steps can be a little tricky, but that’s why were doing everything in pencil right now. If you have any trouble, don’t worry, take the time to erase and redraw. Now, we’re going to try to add the positions for Chopper Man’s appendages. We’ll start by drawing a smallish circle in the corner on the right of the head circle. Then, we’ll add a rounded half circle to the side of the body circle on the left. Lastly, we’ll add two half-moons beneath the body circle for his feet. Notice that for just this step there are no lines connecting the feet to the body. We’ll take care of that next.
Step 7
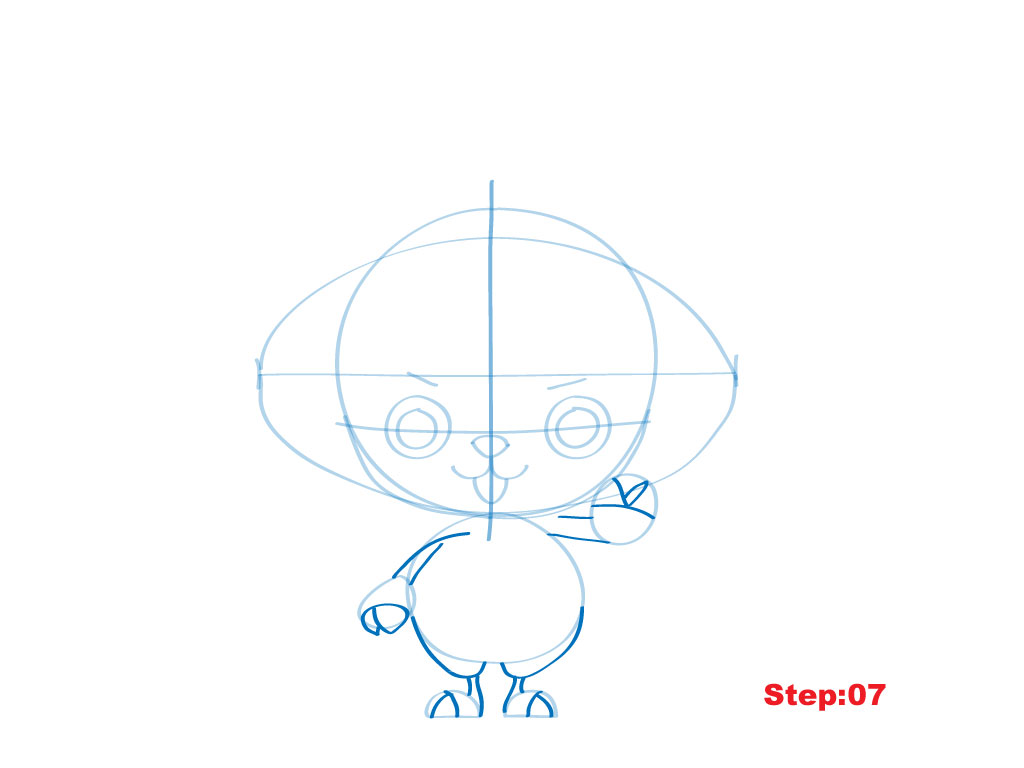
Step 7: But first, let’s start at the top with the hands. For Chopper’s hand on the right, start by drawing a line cutting our hand circle in half. Then, draw a “V” in the top half of the hand. Add a last line inside the “V” for our 3d effect. Then draw two lines for the arm, the top one nearly touching the head circle. Great!, we’ve got one “chopper” down. For his hand on the left, draw a line cutting our hand shape into two and then add the pincers. They should look like cloven pig’s feet in the end. Now, from about half way up the body circle on both sides we’ll draw curving lines for his legs. After we’ve got them in place on either side, we’ll connect the upper leg to the feet we drew in the previous step with two lines. The outer line terminates on the top of the foot, the inner line at the bottom on the inside of the foot. Lastly, cut the feet almost in half with a line and add the line splitting the end of his foot into his “hoof” looking choppers.
Step 8
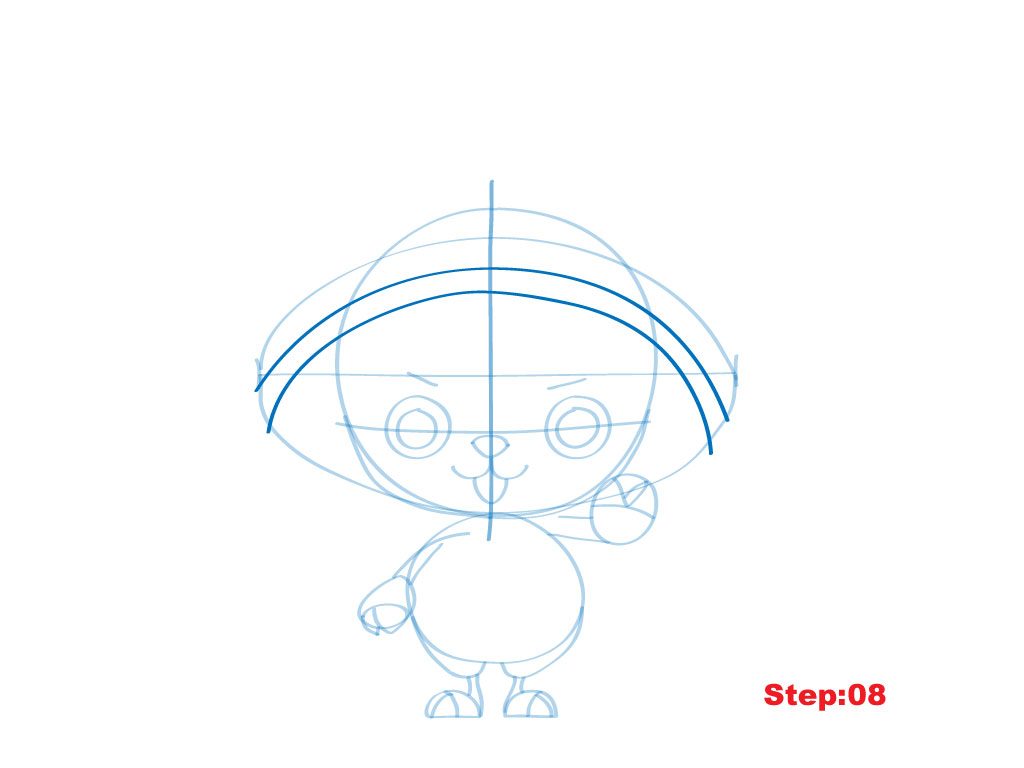
Step 8: That was a giant step, so we’re going to take it easy for a little bit. Feel free to take a minute and lighten any of the construction lines with your kneadable eraser. Here, we’re just going to add two lines to Chopper’s hat. It might be easier to start with the upper line which starts and ends a little below the hat line we drew before. Then add another line below it.
Step 9
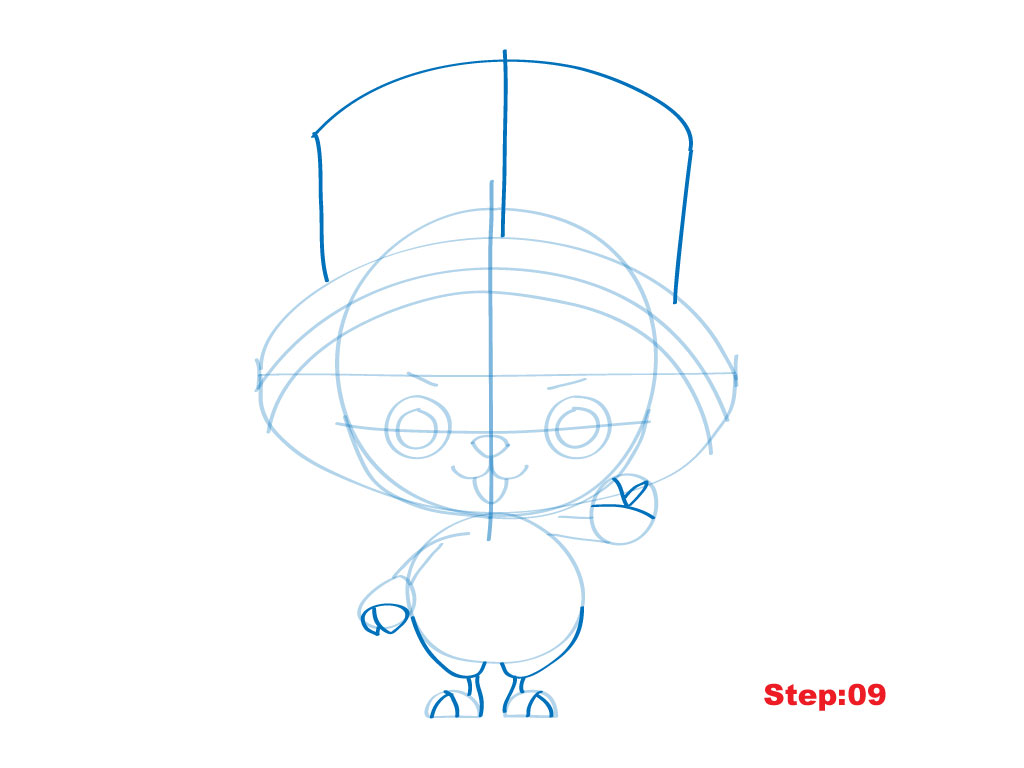
Step 9: Time for Chopper’s hat! Starting from just to the right of the center line on the head we’ll draw a straight vertical line. We’ll add two shorter vertical lines on either side and connect them with an upward curving line. Got it? Great, let’s move on.
Step 10
Step 10: Chopper’s cape gives him the power to fly, so we can’t miss that. We should draw a kind of rounded triangle shape for his cape. It should cut through Chopper’s feet and just touch his hand on the left. Next, in the corners of the hat we’ll add two shovel head like shapes for Chopper’s antlers that overlap the corners (an example of our 3D overlap principle).

Step 11
Step 11: alright, mangakas, we’ve got another pretty big step in front of us, but we’ll take it step by step starting from the toes and moving up. First, let’s add a sinuous line on both sides of Chopper’s cape. Next, we should work on the cape’s knot around his kneck. Start with a small circle in the center and then draw two irregular leaf like shapes on either side. Add a few small dashes to suggest wrinkles and don’t forget to connect the knot to the cape over the shoulders on both sides. Once you’re happy with your knot we’ll put two small circles inside his Chopper hand on the right. We’re continuing to move upwards here.
Next, we’ll add another curved line to his face below all of the hat lines we’ve drawn so far and only touching the head circle on either side. Above the hat brim, and again on either side, we’ll draw an upside down “U” shape in the corners of the hat for Chopper’s ears and then cut them in half with a line. Ok, we’re nearly there. We need to draw a tube that connects the hat to his antler shapes. Once we have those, we can add the antlers. They should look a bit like fingers and the outer portion have three “fingers” each while the inner portion has only two. Before moving on we’ll finish up with a large block “X” on the hat situated on the center line of the hat and not the center line of the head.

Step 12
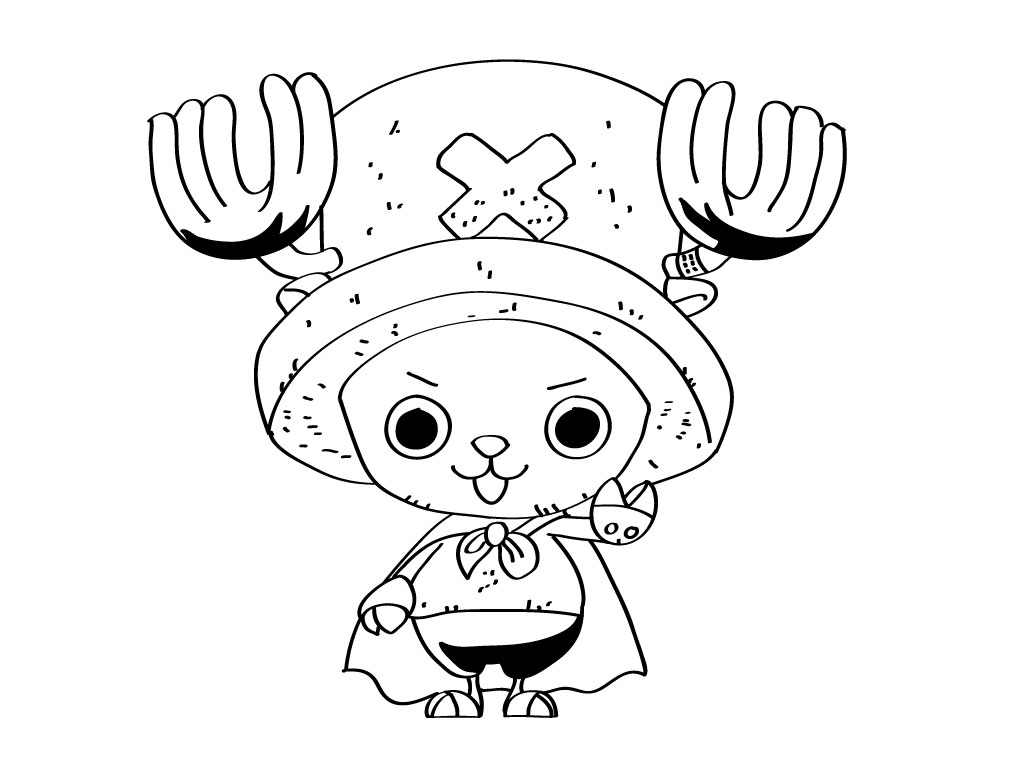
Step 12: Wow, great job everyone!! We’re nearly finished. We’ll add a few more details but now in pen, and lastly we’ll do some filling and we’ll be all finished. Let’s get out our eraser and lighten up all of our construction lines. Then we’ll take our pen and trace over our outer lines to get our nearly finished final version.

Step 13
Step 13: You can do this step first in pencil if you’re not very confident. But all we have to do is add a line to his lower body and then up on the antlers, we’ll add two flame like symbols on the lower part of the antlers.

Step 14
Step 14: Using just your pen, we’ve got to rough Chopper up a little bit with some points and dashes over his body. We should leave most of his face, but not the very bottom, the antlers and the lower body mostly empty of points. After you’ve added some, we’ll move on to our last step.






3 comments
Nice and easy tutorial, thx Hiroshi
Comments are closed.