Totoro is quite easy to draw so I would recommend this tutorial to both beginners and intermediate manga artists (-_^)
Let’s talk about tools first. While this tutorial was created in Open Canvas you can follow along using any painting software. I’ve designed it so it’s also easy to follow along using just pencil and paper.
Whenever you see me using blue lines remember that these are only construction lines and will be erased later. So make sure you don’t make them too dark on the paper.
The tools I use while drawing on paper are:
1. Any kind of mechanical pencil. 0.5 HB being the most universal as you can make it quite dark.
2. A kneaded eraser, this one is great not only for erasing without damaging the paper but also for lightening up the construction lines.
3. And of course a Mono Zero eraser stick. It’s great for erasing details and drawing reflections such as highlights in the eyes. It could be hard to get, I usually order mine from Japan through jlist.com
Step 1
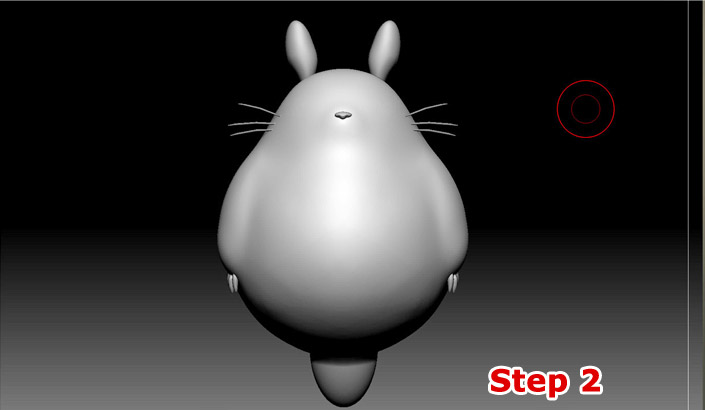
I like to create 3d models of the characters so I can visualize the main forms in 3D. But we will not really need to do that in this tutorial as we are going to draw the Totoro from the front which is probably the easiest thing in the world .

Step 2
When you look at the main shapes that make up Totoro you will see that he is basically one big sphere with another smaller sphere on top of it with big ears. It will be fun to draw him.
Step 3
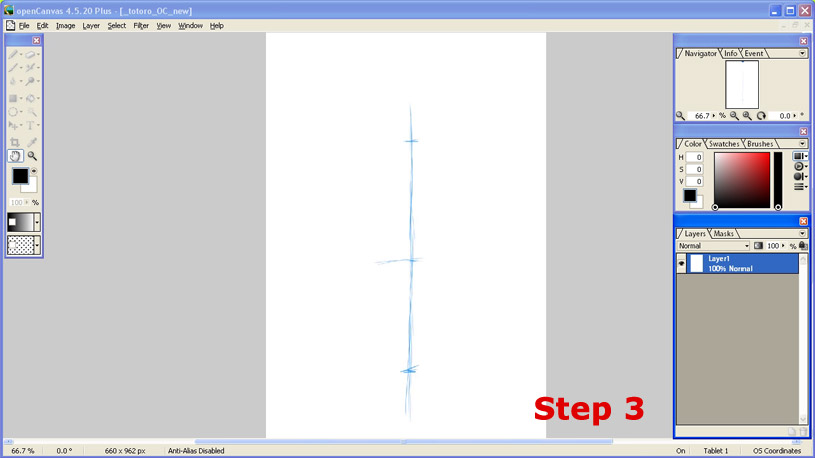
Big circles can sometimes be hard to draw so what we will do is start with a point at the circle’s center. Then draw a vertical line through this point and mark two points near the top and bottom of the line that are equal distance from the center point. This will be the top and the bottom of the big circle. Leave some space on your paper for the Totoro’s head above and the tail below.
Step 4
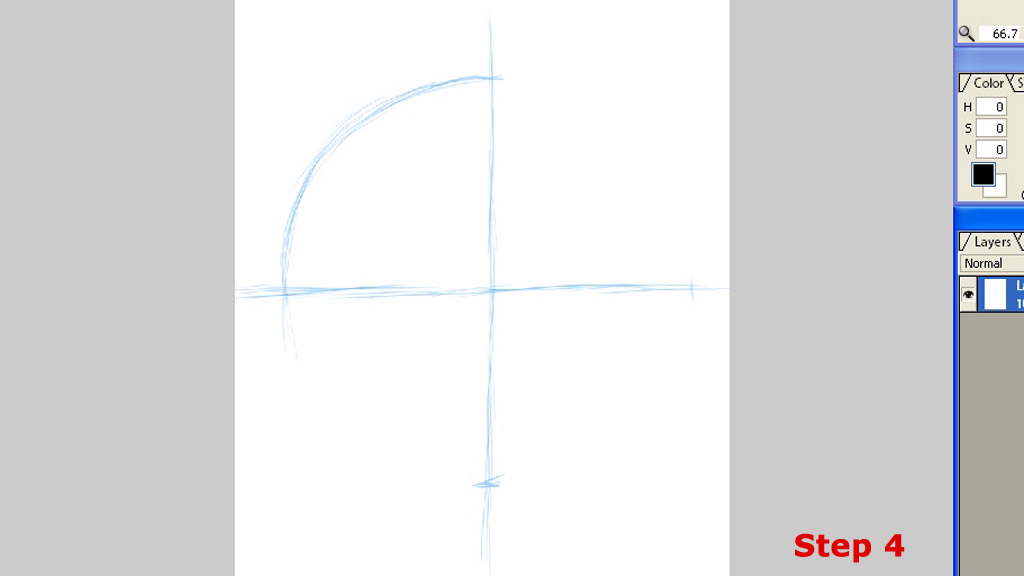
Now draw a horizontal line and two equidistant points from the center like in the previous step. Start to connect the points to create a big circle. Do not try to do it in one stroke, use many shorter strokes to find the right shape. Remember these are just construction lines and the point is to get the perfect shape. It is not a competition to do it in the least number of strokes.
Step 5
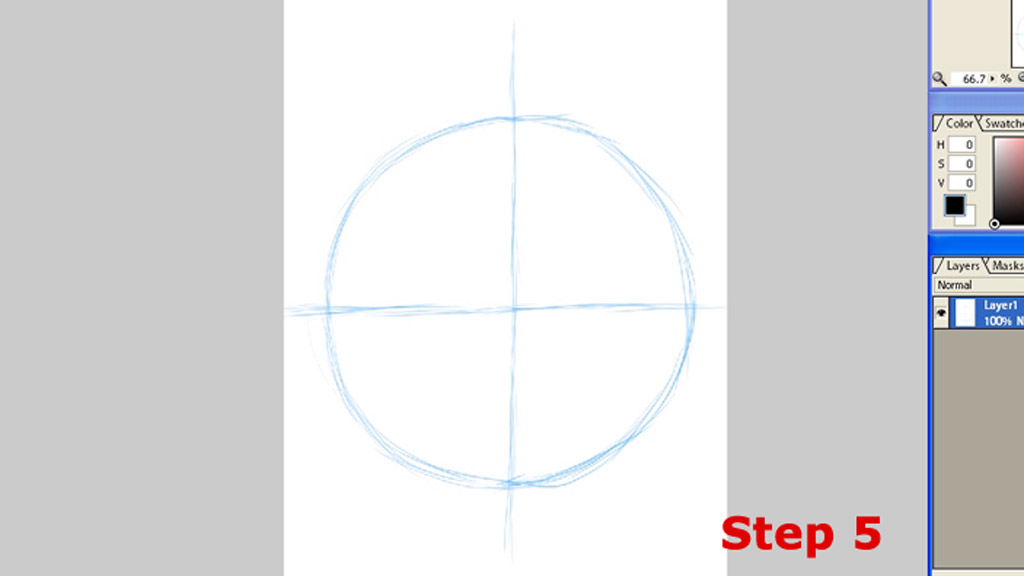
In this step we should have a finished circle with enough space remaining on the paper above and some below it.
Step 6
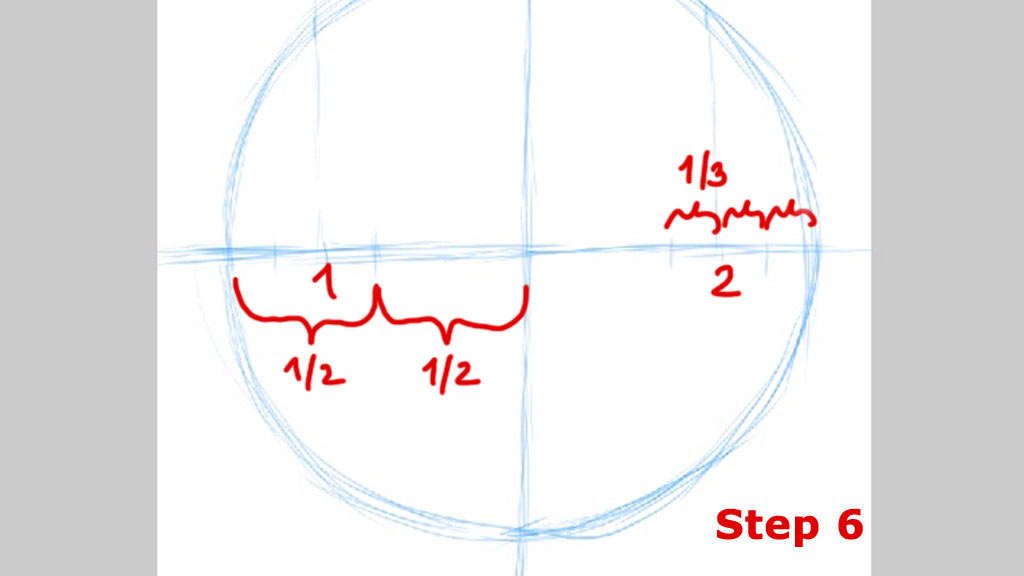
Now divide the horizontal line between the center and the circumference of the circle in half. Then divide the half closest to the the edge of the circle into 3 parts. This will help us allocate the space for Totoro’s head and hands. Draw straight vertical lines starting at the second mark from the edge. The intersection between this line and the circle will mark the base of the head. Let’s mark these points 1 and 2.
Step 7
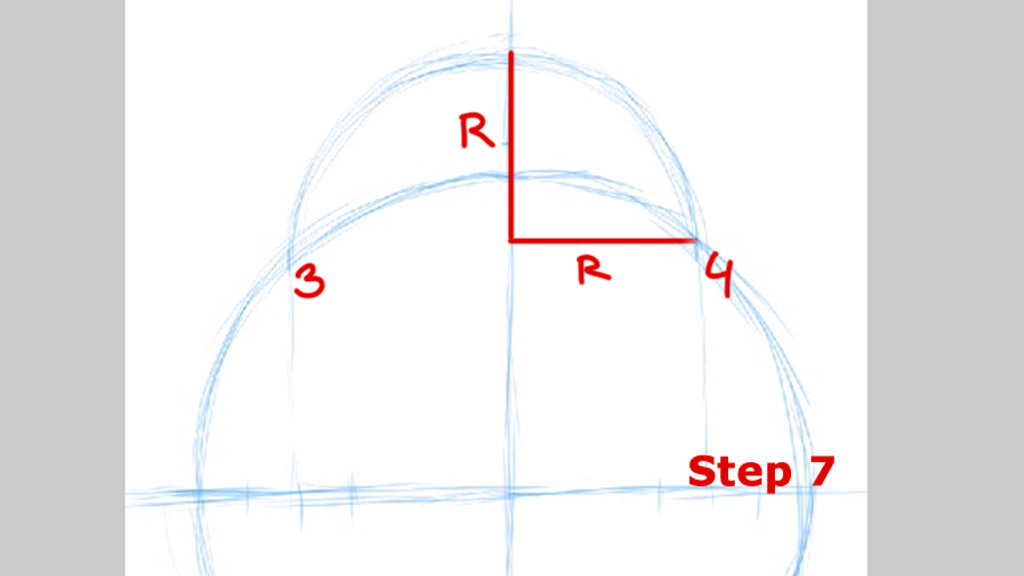
Draw a half circle for the head. If you connect the base points 3 and 4 the intersection between this line and the original body circle’s vertical line should also be the center point of the Totoro’s head circle.
Step 8
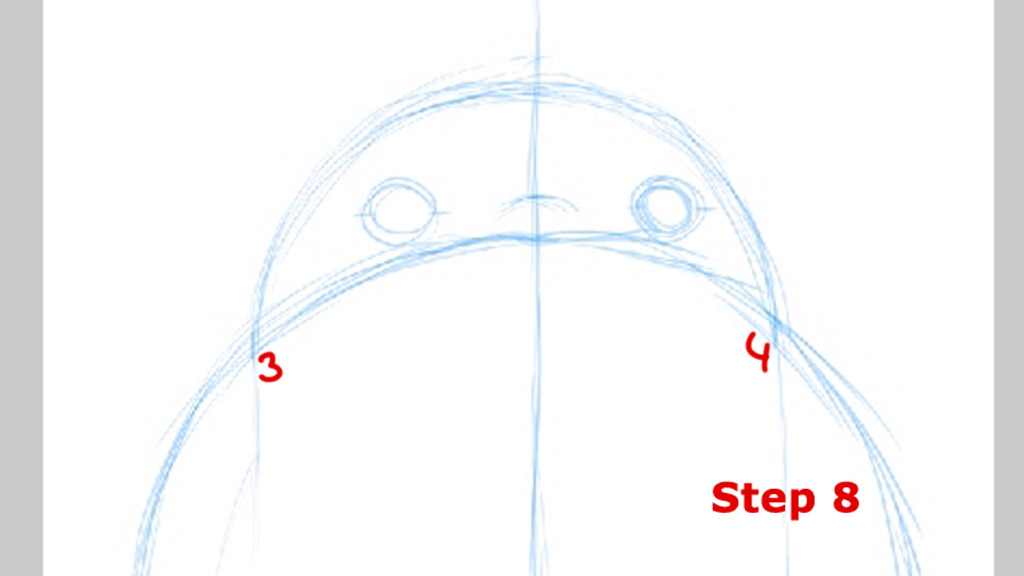
Now add eyes and a muzzle line. Make Totoro’s eyes a little bigger than on the picture above. They should touch the body circle.
Step 9
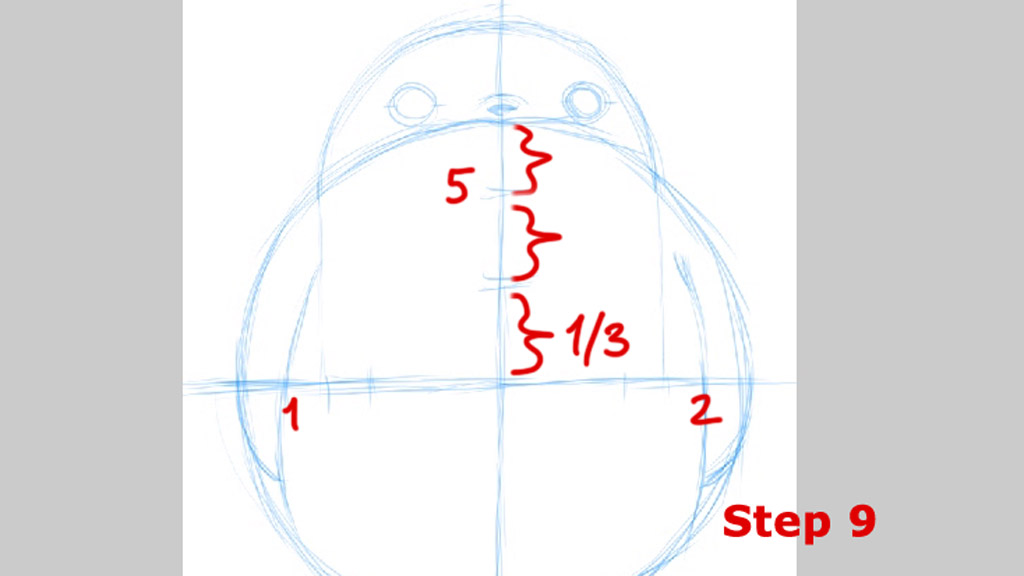
Add the nose and hands. The hands should pass through the point 1 and 2. Now divide the top half of the body circle vertical line in 3 equal parts. This will help us locate the belly line at point 5.
Step 10
Draw a half circle connecting the points 1 and 2 and passing through point 5. This will represent the belly line.
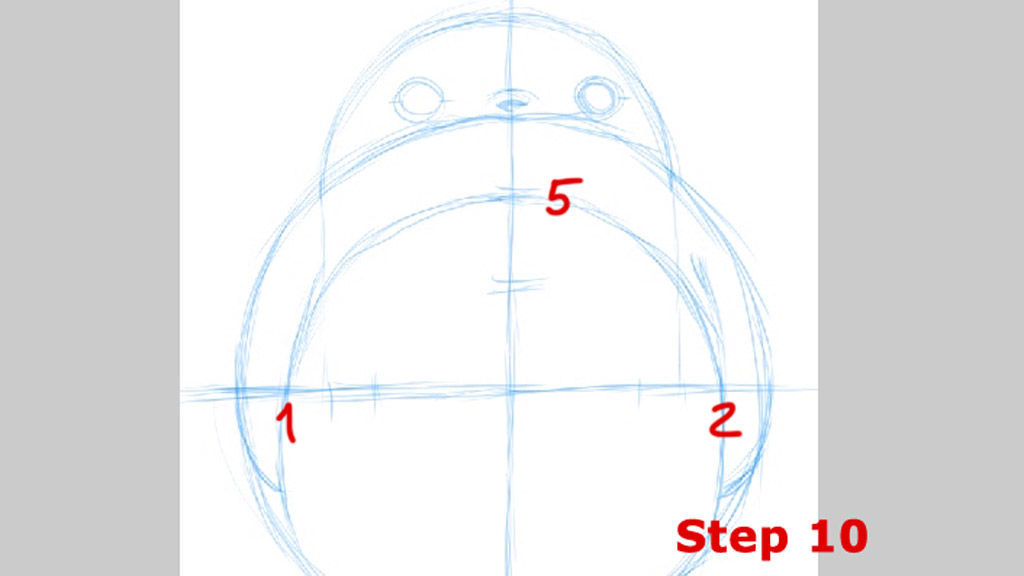
Step 11
Totoro will need some ears. ^_^ They should be a little bigger than I have drawn them here. Start by drawing the centerlines of the ears at a right angle. The base of the center lines should start from about the same point as the inner edges of eyes.
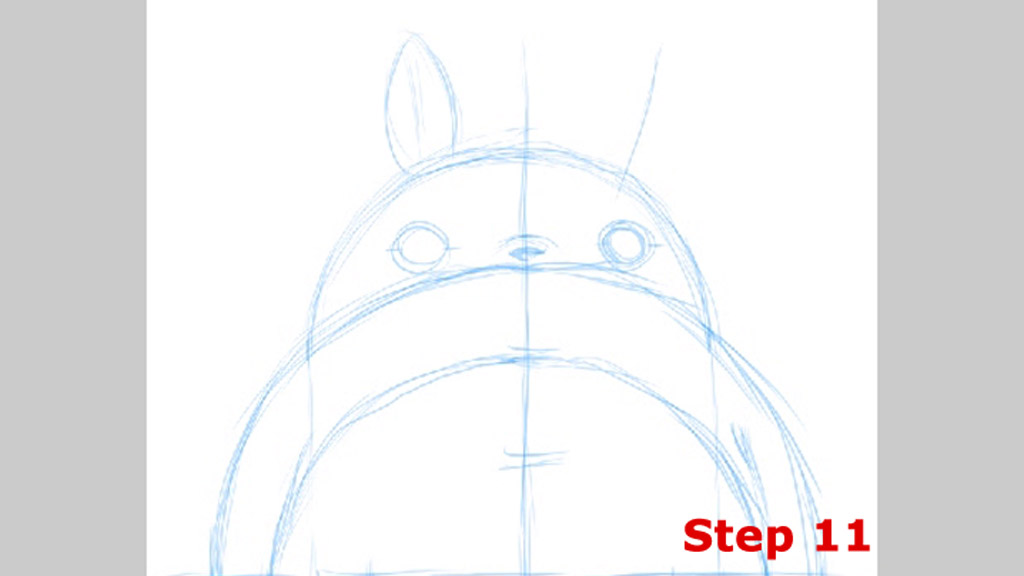
Step 12
Add the tail and draw a bottom line of the sitting Totoro.
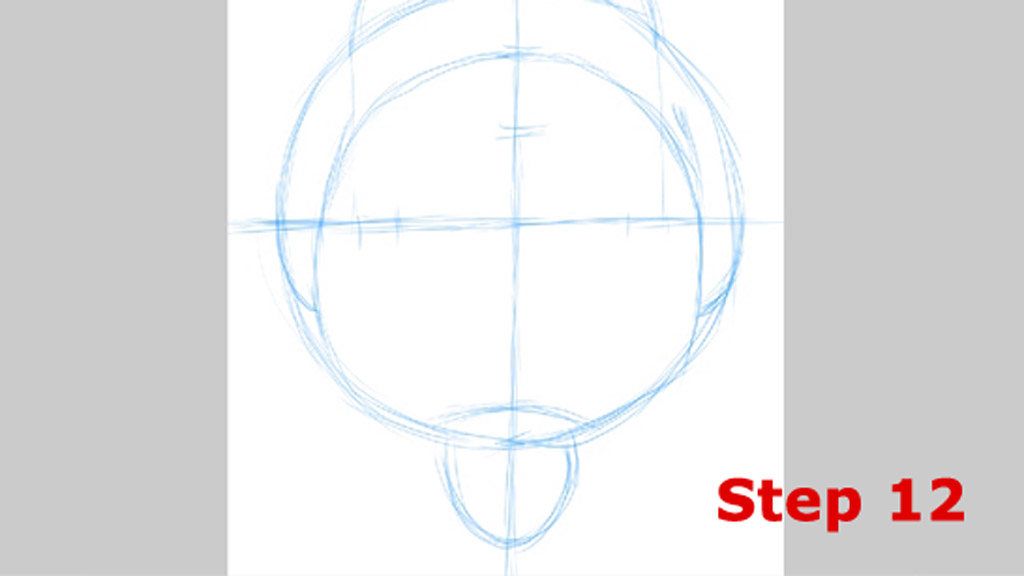
Step 13
Add the tree. The tail will be behind the tree in the final image. Now you can draw the legs.
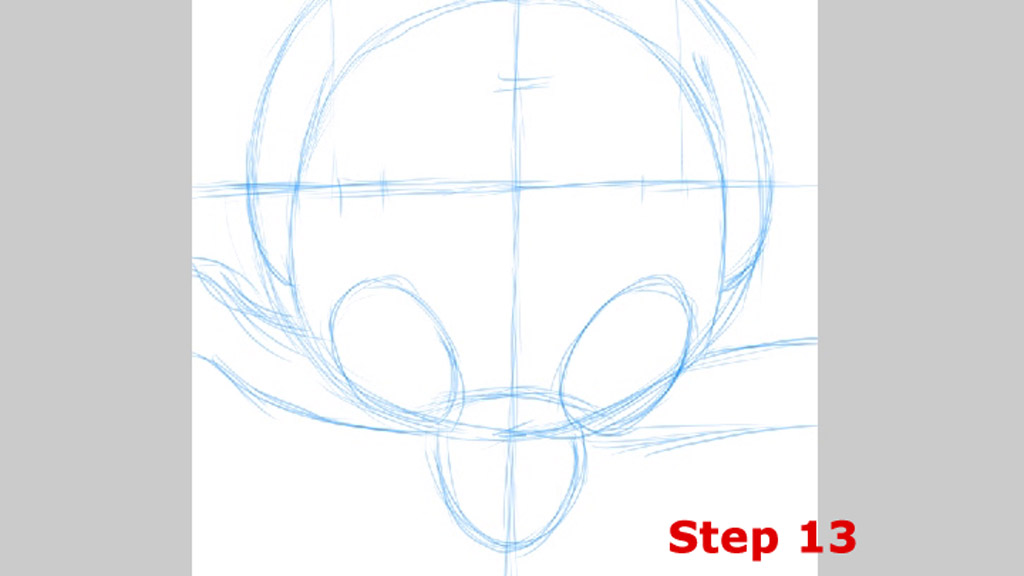
Step 14
Draw the foot circles inside the legs and whiskers and we have the main Totoro’s shape done.
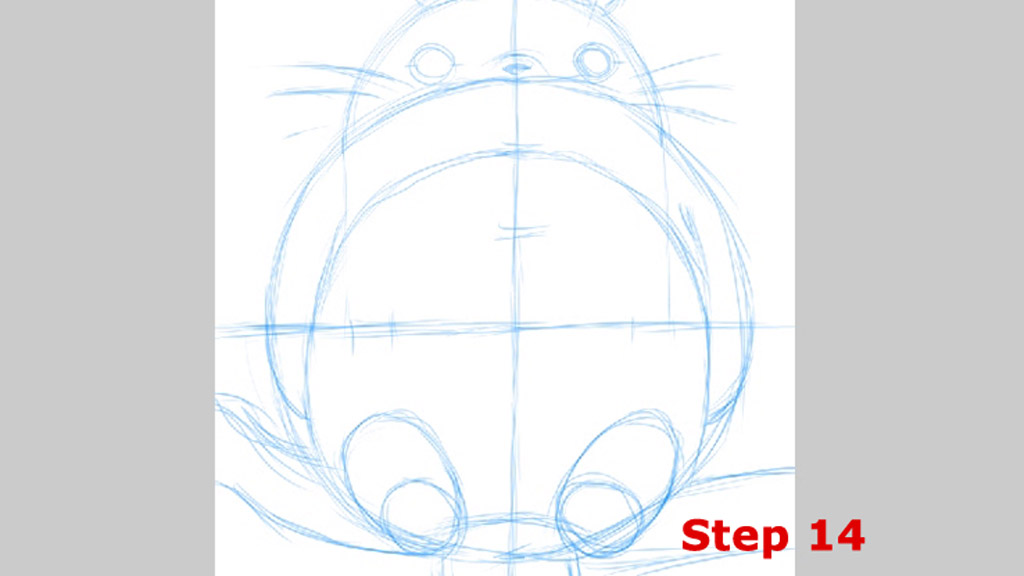
Step 15
A good rule I try to stick to is to never start drawing the final line till I have got all the important details drawn in blue lines. Remember blue lines are for finding the right shape and it is ok to erase, etc. But once you get to the final line you want it to be pretty dark and it is hard to erase. You should more or less only contour your almost invisible construction lines that are already in place. And yes I don’t always stick to this rule, but every time I break it I am sorry later. So what we are doing here is adding all the details before we finish the drawing.
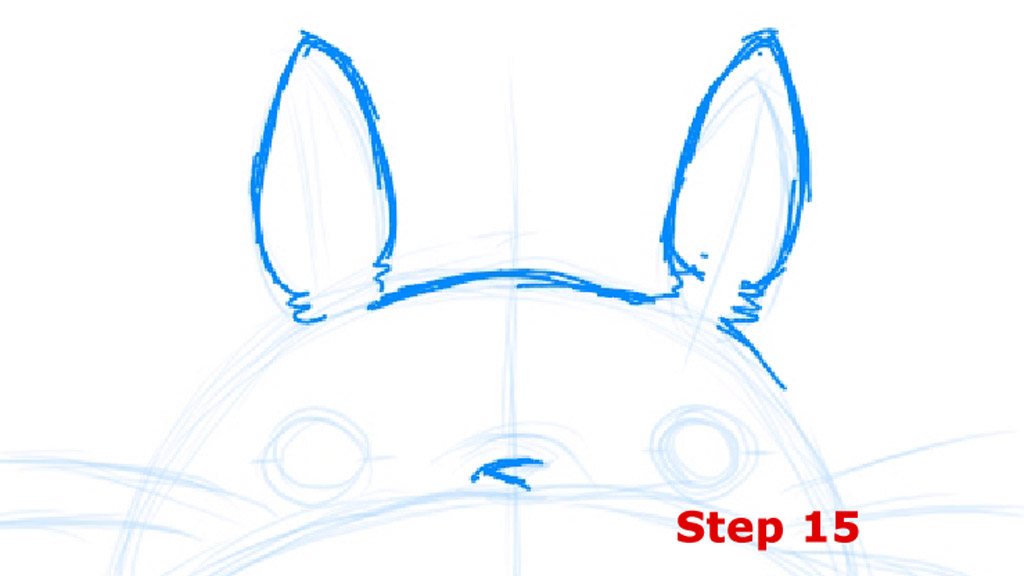
Step 16
Lets add more details for Totoro’s eyes and nose. As I said earlier the eyes should touch the main circle line. Notice the small lines on the corner edges of the eyes that are signs of the line between his eye lids.
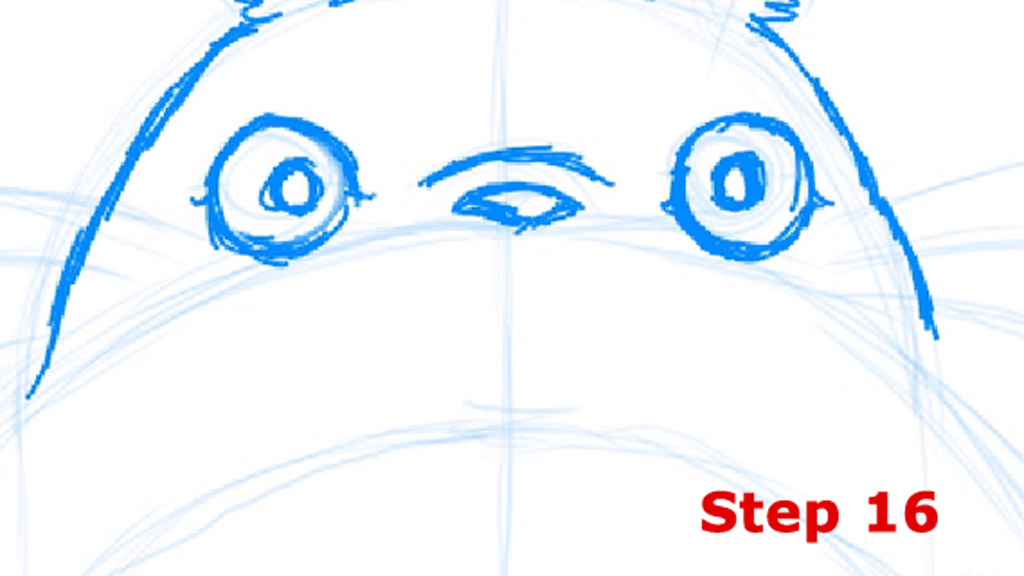
Step 17
Draw the mouth. It is quite small and slightly above the belly line. Note that the centre of Totoro’s belly line is V shaped.
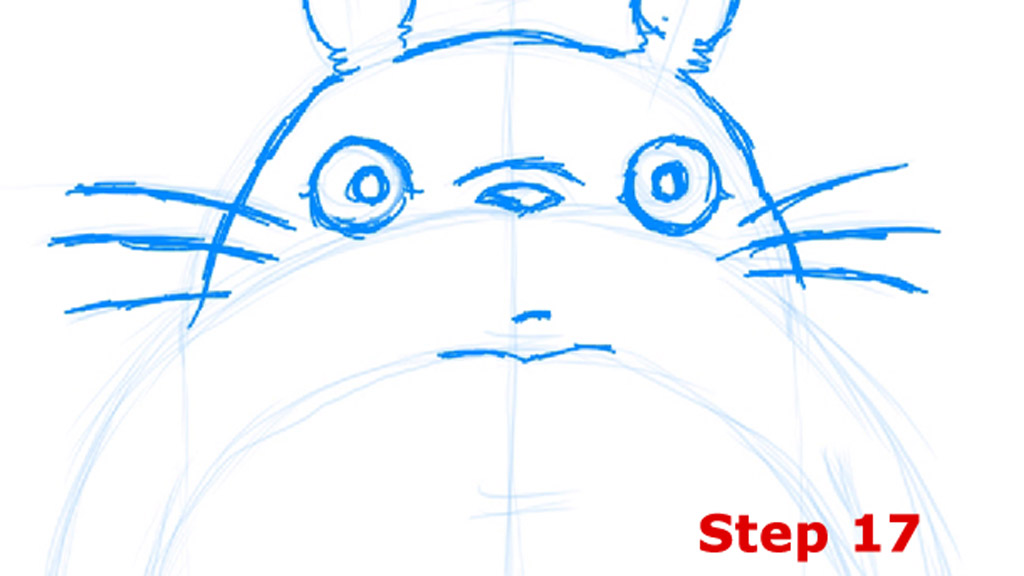
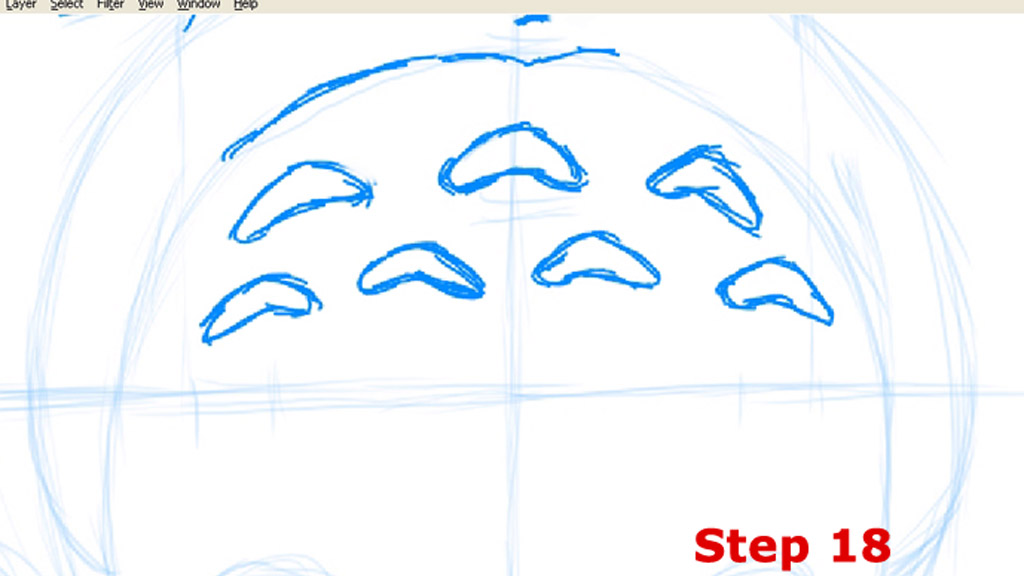
Step 18
I spent some time thinking about what these symbols on his chests are. Then I realized Totoro was probably inspired by both a rabbit and an owl. Look at how he sits on the tree branch. Can you see it now?
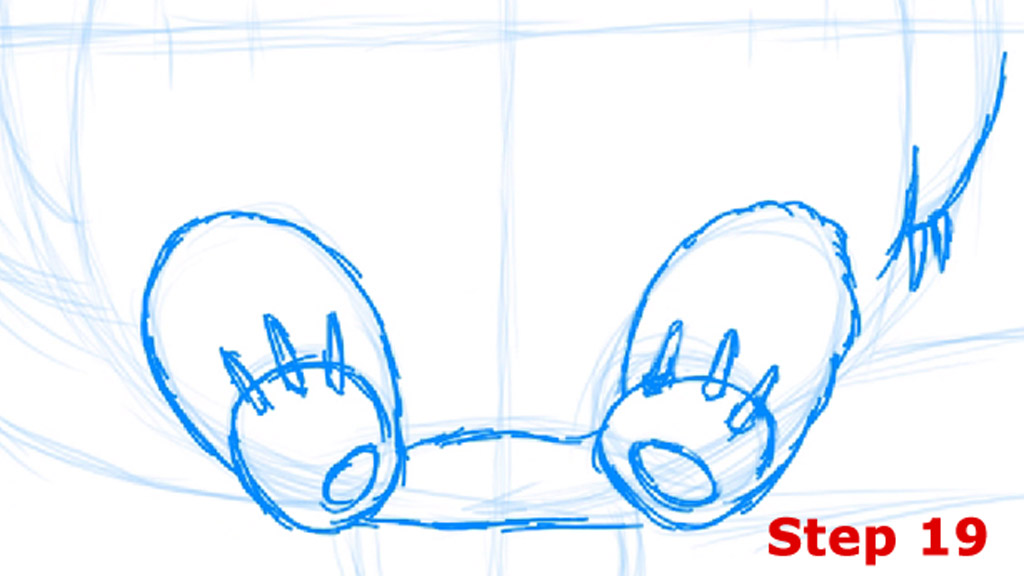
Step 19
Draw in details to the legs and hands. Notice that the claws start inside the paws, slightly at the hand and noticeably at the feet. This will give the image a more 3d space feeling. The lines of Totoro’s body should be quite shaggy to suggest a sense of fur.
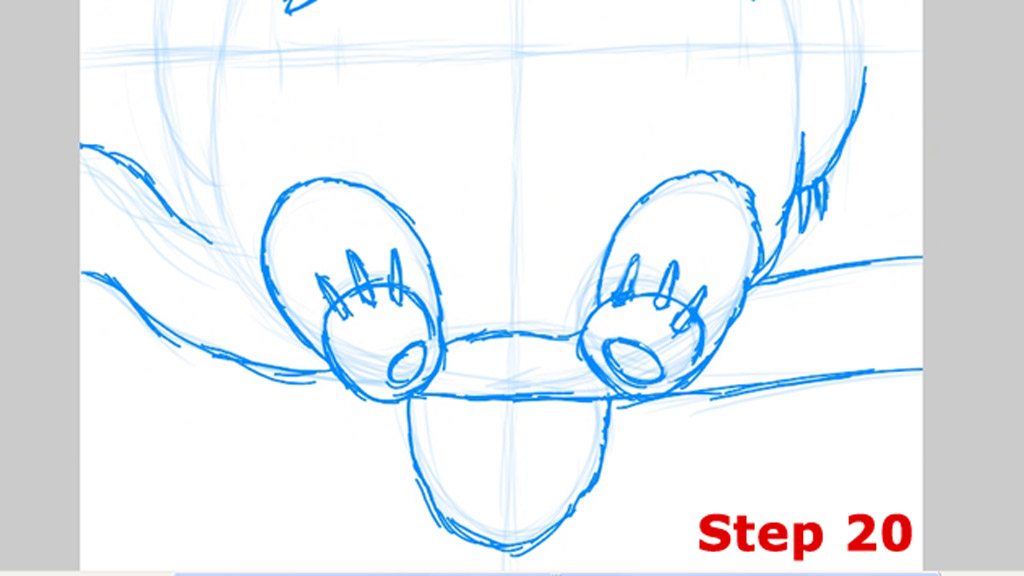
Step 20
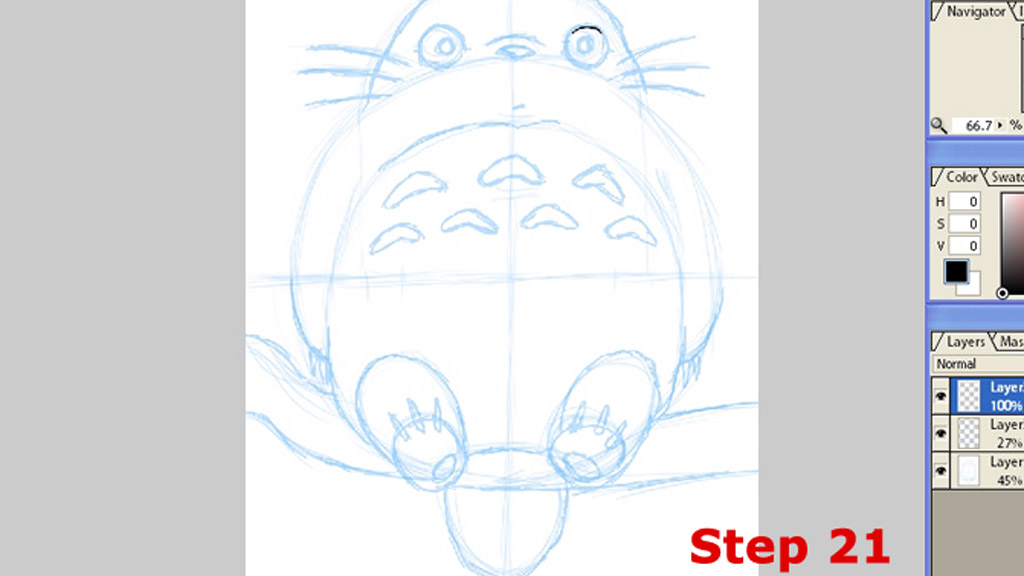
Step 21
Ok now that we have all the details, erase the construction lines with a kneadable eraser so that they are only slightly visible. Now you can contour the lines with a final line. If you are in Photoshop or Open Canvas just make the construction layers more transparent and create a new layer above.
Step 22
Try to draw the final line as cleanly as possible. Notice that Totoro’s muzzle isn’t one straight line but several smaller lines again to suggest fur.
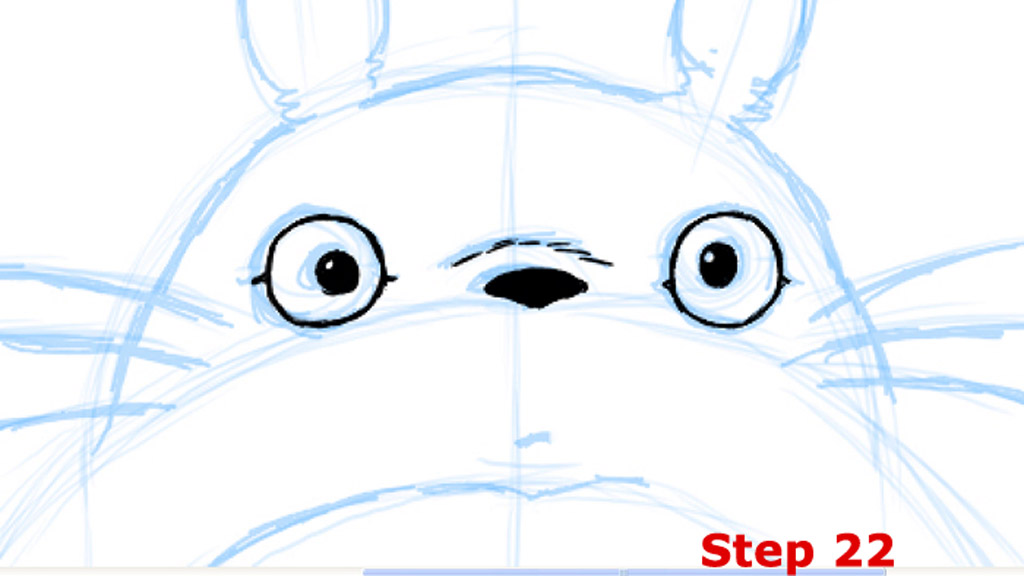
Step 23
Make Totoro’s belly line especially shaggy. These are small connected spikes pointing out of from his center.
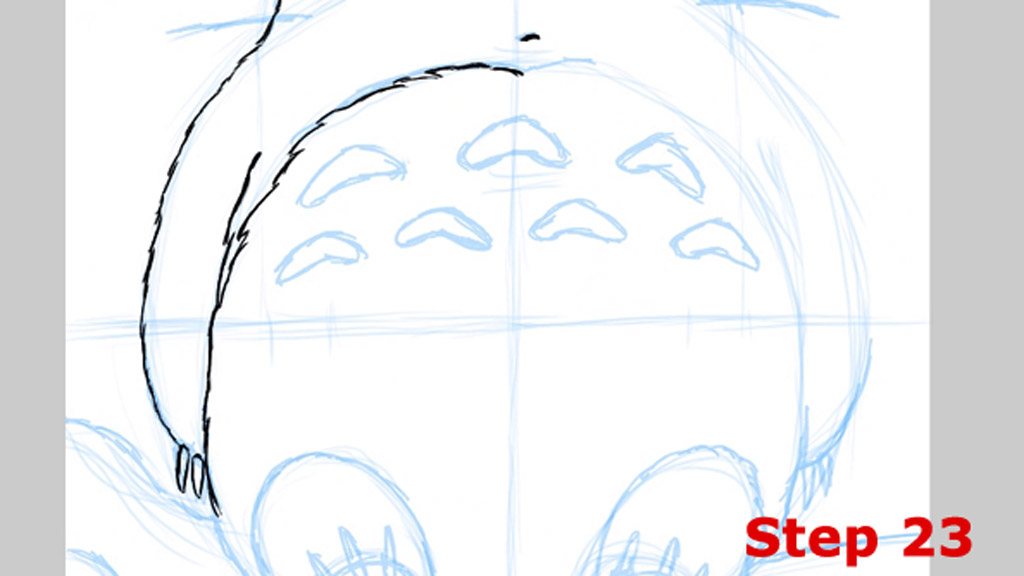
Step 24
Finish tree and tail. The bottom of Totoro has 3 more subtle spikes.
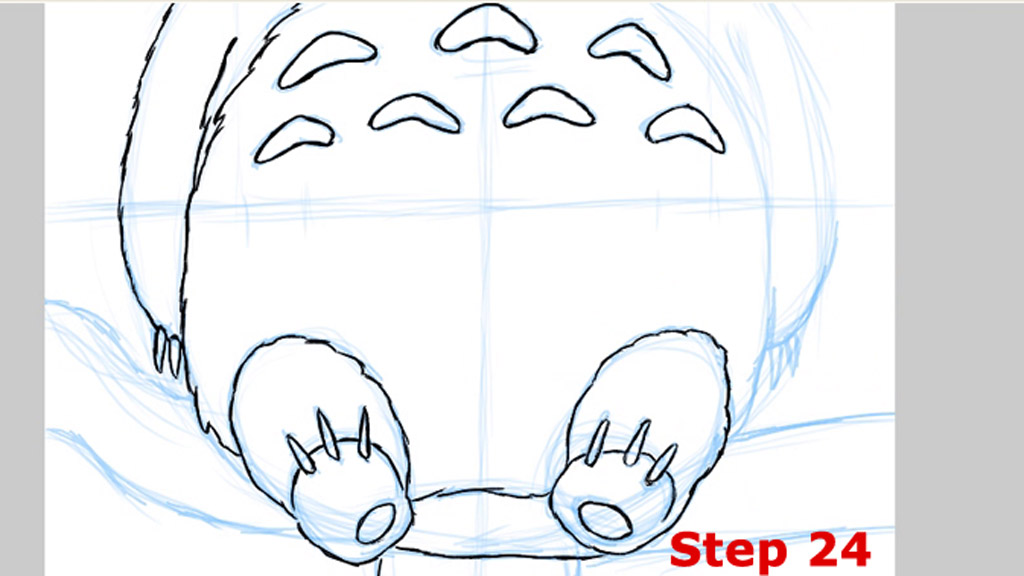
Step 25
Ok, we have the finished Totoro here. I turned off the construction line layers and it should look similar on your paper as I hope you erased your construction lines enough before drawing the final ones. The only thing I am not happy about in mine picture is line quality. It seems to me the lines should be bolder especially the contours.
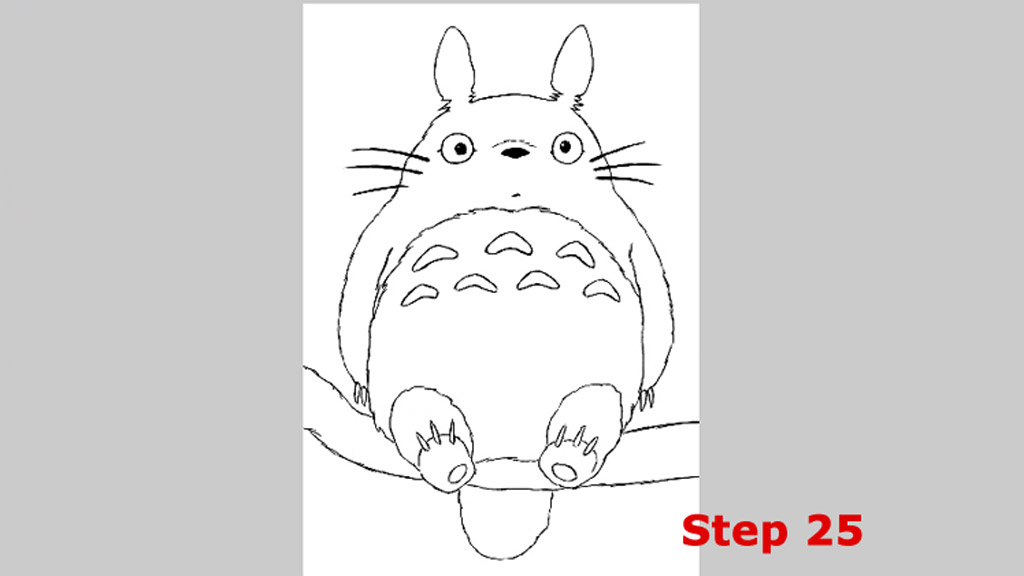
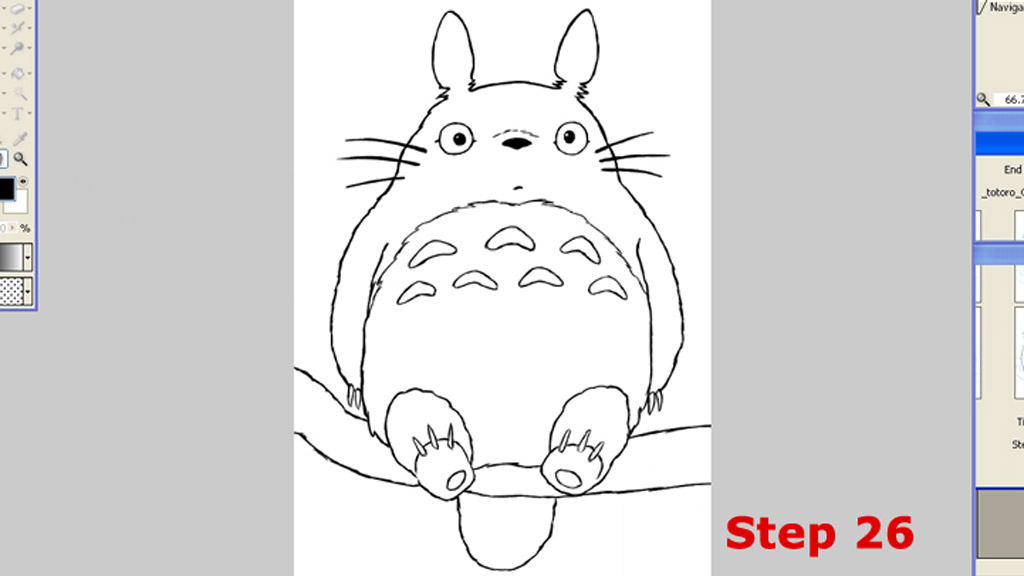
Step 26
I went over all the lines again except for the eyes, muzzle, claws and belly to make them bolder. You can do it by selecting a wider brush/mechanical pencil (for example 0.7) but in most cases it is enough to just draw it over with the pencil you started with. We have the lines ready for coloring and we will color him in the next tutorial.
Final words: Once you finish the drawing be sure to try to draw it from memory. This is the most important part, the part that will make you a better artist. Don’t look at the picture , try to draw what you remember and then compare the finished picture to original. Repair any mistakes and try to draw it from memory again. I am sure you’ll see the improvement instantly. The more pictures you can draw from memory the more confidence and motivation you will have to draw more. So do it!





12 comments
awesome !
thnk you so much
I also liked Totoro very much! A really cute movie!
>w< What a cute and accurate Totoro! Good job!
What can you reccommend me to do next?
Comments are closed.